Introduction
Although many aspects of dentistry have seen massive improvements in technology, process, and efficiency, shade communication and determination have been largely unchanged. The introduction of Mobile Dental Photography has not only expedited a technical jump, but has also opened the door to stark process improvements.
Accelerated by a pandemic and the near extinction of the point and shoot camera, the use of mobile cameras in the dental office is no longer “coming soon”; it is here. The question now is not should I use it, but how best to use it.
Consistency and quality of dentist photos are especially important in the communication and determination of shade and aesthetics because many labs are choosing not to see or limiting patient visits. In addition to health reasons, custom shade visits are expensive as they break the technician’s concentration and stop production. Additionally, patient visits are not always geographically practical.
This article will explore the growing pains the dental industry is experiencing in regards to the use of mobile photography. We will discuss a different approach to shade determination that is more efficient, more secure and reduces or eliminates subjective analysis than today’s mainstream procedures. Some of the components are familiar and some are new. Artistry and experience are not replaced. The workflow provided will show the seamless integration and optimization of mobile dental photography using the iPhone, cloud-based communication and computerized shade analysis.
Why We’re Turning to Mobile Dental Photography (MDP)
The use of mobile photography is late in coming to dentistry. About eighty-five percent of all photos taken are from mobile photography but we estimate only twenty-five to thirty percent penetration in dentistry (1). There are many reasons for the growth in MDP. Perhaps the biggest is convenience (2), second is markedly improved cameras, third is fewer choices in traditional camera types and fourth is the avoidance of the bulky, sophisticated, Single Lens Reflex (SLR) camera. Let’s go through some of these motivators to this paradigm shift.
Convenience
Phones are familiar, comfortable and connected. Most of us take pictures with our phones every day, and it is easy to send information from our device. The alternative, using traditional cameras, has more steps and takes more time. One must remove and connect the memory card, locate and sort the images, open and attach to the lab’s email or upload to a portal.
To be most efficient and discussed later in Control of the Camera, is using a secure direct connection, via the internet, from the camera to the lab’s cloud account.
Mobile Camera Improvement
The iPhone 8, released in 2017, and newer models, have the photo quality needed for dental photography. Older models did not provide adequate color and detail. The advent of the dual camera system on certain models makes it even better because of the doubling of optical zoom to 2X. The third camera, in more recent versions, is for a super wide angle, not needed in dentistry.
Fewer Camera Choices
Less thought of but essential to this discussion is the near extinction of a class of camera, the compact or Point and Shoot (P&S). Since 2007, the year of the iPhone release, there has been a rapid decline in the purchase of P&S cameras. Sales peaked in 2010 and were taken over by the explosion in the use of mobile phones. By 2016, the mobile phone market share reached about 98 percent of digital cameras sold. Everyone knows the trend. Worldwide, traditional camera sales have dropped by 92 percent from 2010 to 2021 (3). iPhone sales being about 1.5 billion per year (4).
The adaptation of P&S cameras in dentistry, except for a couple of exceptions, has reached the end of their useful life. Traditional camera companies are teetering. This being the case, photo documentation in dentistry will not stop, so what will fill the void? There is little doubt that it is mobile photography but there are challenges to performance as dental photography is a very specific niche.
Mobile Camera Approaches
There are 4 ways that people are using mobile phones in dental photography.
- Most use the camera as any consumer.
- With added external lighting.
- With an app that gives a guideline of what pictures to take along with editing for presentation.
- With the use of a HIPAA compliant app with software that controls the camera’s settings and seamlessly integrates with the dental lab for automated shade matching.
Mobile Camera Photo Quality Without an App
Most lab professionals will tell you that the majority of photos received without an app are poor and not clinically useful. Just taking a photo does not mean it is meaningful. In one study, twenty-four percent of 106 cases were with a mobile camera and eighty-six percent were not useful (5). So why is that?
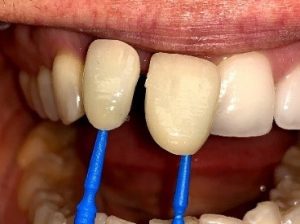
Unlike traditional cameras, the optimal settings with mobile cameras are not widely known, obvious or memorized in the camera. This is by design. Mobile camera makers don’t want clunky knobs, buttons and an overabundance of menus or the need to search for manual settings every use. Other shortcomings are the flash is often not used, photos stay on the user’s phone, emails are not HIPAA compliant and when emailing, users often choose too small of resolution. Other common mistakes are using the default wide-angle camera setting that results in geometric distortion (Fig. 1, 2) and making the photo in portrait orientation. Convenient, yes, meaningful, often not.
Ideal Camera Settings
To improve photos, here are the optimal settings if done manually by the user.
- Shoot in landscape (horizontal)
- Flash on (no need for additional external light)
- Zoom in about 3x
- Lower exposure
- Working distance about 4 ½ inches
- Email at full resolution
Optimizing Mobile Dental Photography, Four Pillars
We propose a holistic approach to mobile photography. Light, and hence color, can be very tricky. You may have the very best dental camera, tuned perfectly, and yet have an unacceptable picture because of outside lighting influences or bad angles to shade tabs and or teeth. Often, we are not even aware of these anomalies until after we look at our photo. Once the patient leaves, it is too late. Looking at the photo process carefully, we propose the following Four Pillar process for best practices:
- Automated software control of the mobile camera
- Hardware control of photography
- Control of the lighting environment and
- Use of a secure, cloud-based communication between dentist and dental laboratory.
Pillar 1, Control of the Camera
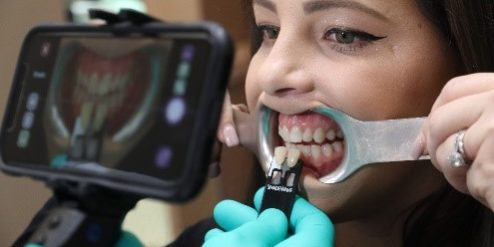
Control is done through an iPhone app called Shadewave Mobile. The user may use wi-fi and it does not require phone service or data. The app’s software sends a set of instructions automating all of the camera’s optimal settings, like an autopilot. Different shooting modes are programmed in for Shade, Portrait, Intraoral and EV (Exposure Value), providing exposure adjustment for dark complexions. Voice command to take and upload the photo makes it all one-handed.
Pillar 2, Control of Photography
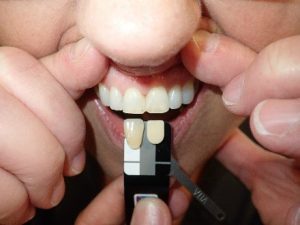
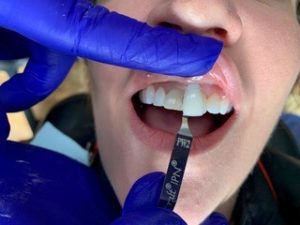
Shade photography has always had an inherent weakness because the shade tab and camera are held independently, resulting in photo variability and inconsistency (Fig. 3). Even if you are shooting in manual with a SLR, angle can be off. A flash at ninety degrees to a shade tab often causes large highlights in the middle of the shade tab often making it non usable.
A solution is to make the shade tabs and camera all one piece, locking in the exact distance, angle, orientation and position. This “template” provides predictable, consistent photos (Fig. 4 and 5).
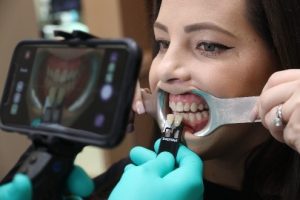 Fig. 3
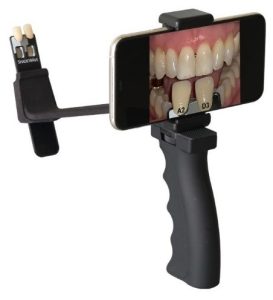 Fig.4,ShadeGrip Pro
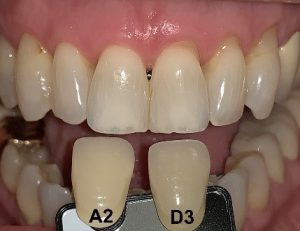 Fig. 5
Pillar 3, Control of the Lighting Environment
Unwanted glare from lighting is a nemesis and unfortunately too common. You cannot see the correct shade under a highlight (Fig. 6 and 7). Some of these sources are from camera flash diffusers, overpowering badly engineered external lights, ceiling lights and/or light coming in from large windows in front of the patient.
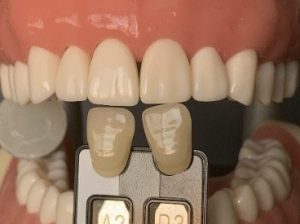
Procedures to eliminate unwanted highlights are raising the dental chair or both patient and photographer sitting at similar heights, closing blinds on big windows or if there are no blinds, turning the dental chair. Our recommendation is to turn off the ceiling lights or if not practical, hold a light diffuser over the patient’s head*(Fig. 8, 9, 10). This is made possible because the app turns on the camera’s torch providing enough light even with the ceiling lights off. The onboard iPhone flash is adjusted for dental photography and found to be quite adequate.
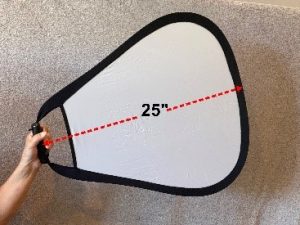 Fig. 8 *Neewer, 24-inch Triangle SKU 10078406
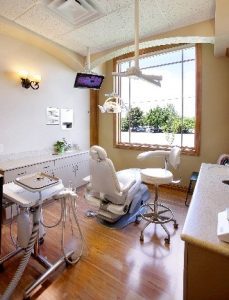 Fig. 9
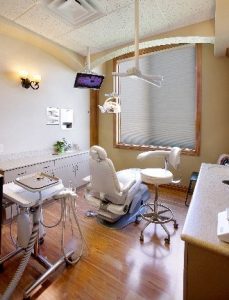 Fig. 10 (closed blinds)
Pillar 4, Use of Cloud-Based, HIPAA Compliant Communication
Email is not the most efficient, manageable or secure way to communicate patient photos. Direct internet connection between the camera and a secure cloud account solves this problem (Fig. 11, 12). It is important that photos are not stored in the mobile camera, they transfer seamlessly to the lab in full resolution, consequently, quality is not diminished and there are no emails to sort through. In addition, there is integration with some lab management software.
 Fig.11
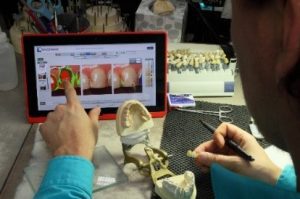 Fig. 12
Digital Workflow, Here is How It All Comes Together
Make photo → Cloud storage and upload directly to the lab → Process photo into a map →
Technician makes prosthesis → Quality Control → Ship to dentist → Try-in/seat → Dentist makes photo of completed case and uploads (both dentist and lab share all photos and maps).
Traditional Shade Taking
There are more steps in traditional shade taking and some of those are subjective (Fig. 13 and 14). So how accurate is this process? In one study only forty-three percent of the time was the correct shade chosen. This increased to sixty-three percent if color corrected lights or daylight were used (6), (Fig. 15). Either way, incorrect shade tab selection poses obvious challenges for the technician.
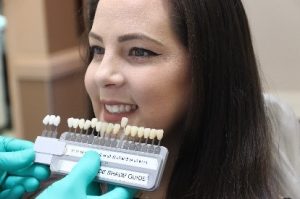 Fig. 13
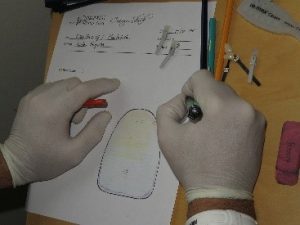 Fig.14
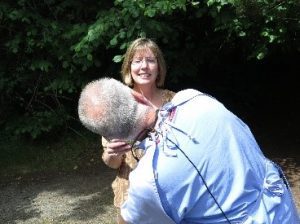 Fig. 15
Computerized Image Analysis
Computerized Image Analysis uses shade tabs as known references to color correct or normalize the photo. An advantage is the shade tabs do not have to match the tooth; thus, you can use the same shade tabs for every case. In the application ShadeWave, photos with shade tabs are sampled and mathematically color corrected to a standard after the photo is made. Color and exposure are adjusted as needed.
Once completed, a map is made of the unknown (tooth) that includes shade, translucency and value (Fig. 16, 17 and 18). Value uses the 3D Master Value groups, 0 to 5 (7). Detailed maps are given to technicians who can perform a Quality Control check of appearance and value.
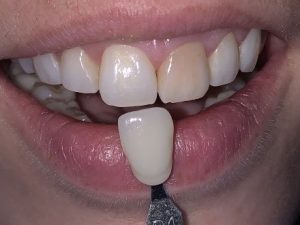 Fig. 16
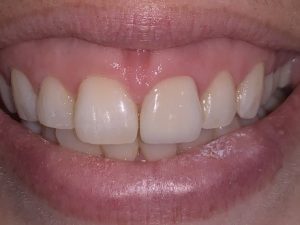 Fig. 17
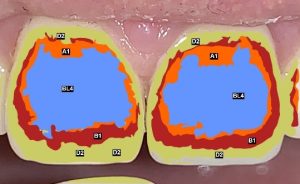 Fig. 18
Dentist: Jill Smith, DMD. Ceramics by Juan Escobar, CDT, AAACD, Inter Chrome Dental Lab
Delivery of Information to the Technician
All of this preparation, technology and attention to detail is irrelevant if the lab technician is provided with a low-quality paper print of information. It is hard to make what you cannot see, and the tooth and gingiva characterization is often lost in a print. One of the many advantages of web-based applications is the unlimited access to the original information. Computer tablets, like the iPad (Apple) and Surface (Microsoft) have amazing displays that provide high detail, contrast and require very little bench space. This allows the technician a more convenient and significantly better media. They can also manipulate and see better views.
Conclusion
The market demand for Mobile Dental Photography and a better, less subjective way to determine shade is expanding. Using software to control the mobile camera’s operation and determine shade is faster and more dependable, resulting in lower cost and better outcomes. At the same time, mobile cameras have clinical capability but getting there is not so obvious, commonly known or published. The objective was to provide information for understanding the behavior of the mobile camera, guidance to achieve improved photography, the benefits of cloud-based applications and an improved way to use technology for shade communication.
This article has been reprinted with permission from the October 2021 Issue of the Journal of Dental Technology (JDT).
About the Author:

Dennis Braunston, Founder of Dental Learning Centers and ShadeWave has been in dental technology since 1990. He patented and developed ShadeWave, shade communication software and an integrated the Apple app, ShadeWave Mobile. He has also developed the ShadeGrip Pro, a shade taking device for mobile photography. Dennis has developed camera systems and has been a provider of continuing education in dental photography and cosmetic imaging since 2001. He has lectured worldwide, authored articles in the Journal of Dental Technology and Contemporary Esthetics. Dennis was also interviewed in Dentistry Uncensored by Howard Farran, Founder, DentalTown.



Thank you for this informative blog……
Thanks for the article on new course to shade determination. I am really happy after reading your articles. Now you can best the mobile dentist services for seniors near you. To know more about the details visit our website today.
Great idea! This is really helpful in my end. Just Keep posting!
This insightful article navigates the evolving landscape of dental photography, focusing on the paradigm shift to Mobile Dental Photography (MDP). The Four Pillar approach ensures optimal results, combining automated camera control, hardware precision, environmental lighting mastery, and secure cloud-based communication. This comprehensive workflow promises efficiency, accuracy, and consistency in dental photography. Kudos to the writer for illuminating this transformative integration. Thank you!
This informative piece emphasizes the importance of dental sealants in preventing cavities, particularly in molars, reducing decay risk by almost 80%. Explaining the application process, and eligibility, and debunking concerns, it promotes early adoption for optimal dental health. Gratitude to the writer for shedding light on this valuable dental protection. Thank you!