By. William R. Mrazek B.Sc., CDT
The following information is designed to educate the technician, dentist, and dental assistant in the accuracy, predictability, and efficiency of the VITA 3D-Master Shade system. I have included a list of recommendations for shade taking technique to help reduce the variables and increase the accuracy and predictability of the shade taking process.
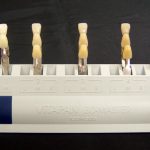
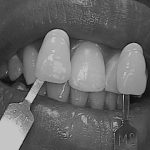
Value determination can be very easy and accurate by simply photographing the any of the 0 – 5 value group tabs in black and white with an intra-oral, digital, or cell phone camera
The utilization of the 3-D Master system over the traditional Classical system provides a more realistic approach and provides a greater selection of measurable shades based upon value, chroma, and hue.
While somewhat intimidating and confusing at first, the original 3D-Master guide has been redesigned in two newer formats, that make it much easier and understandable to anyone involved in the shade matching process. While I personally, as a ceramist, prefer the original design with all the shades on one holder, the newer designs certainly simplify the chairside shade taking process.
I hope that you find this information valuable and useful in your goal to achieve consistently accurate shades utilizing what is, in my opinion, the most accurate and predictable vision-based shade selection process available today.
Shade Taking Tips
- Make sure the patient is sitting in a normal upright position when the shade is being taken, NOT in the horizontal operative position. The angle at which light enters the mouth significantly influences how the shade is perceived. Do not use the chair operatory light as a light source for shade taking unless it has a 5500 degree color corrected light option.
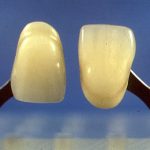
Shade appears very different between these identical A1 tabs when compared side-by-side in maxillary and mandibular positions.
- Install color corrected 5500 degree K. rating in the shade taking area, or utilize an accurate digital shade taking device, such as the VITA EASY SHADE.
- ALWAYS take the shade before prepping the tooth. Verify the shade after prepping only if the adjacent teeth have been kept completely hydrated during prepping.
- Position the shade tab in the same position (maxillary or mandibular) as the tooth being measured
- Always view the shade from both direct and slight indirect viewpoints.
- Allow the patient to review your choice in a sitting up position. Make sure they hold the mirror at arm’s length (speaker’s distance) from their face. This also applies when the patient is evaluating the restoration at delivery. Holding the mirror at arm’s length also allows for the proper amount of light to enter the mouth.
- View the shade of the restoration under natural daylight, incandescent, and fluorescent light if the restoration is supported by a metal coping or framework due to metamerism.
Proper Positioning of Shade Tabs for Dentin and Incisal Matching
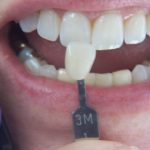
Edge to edge for incisal shade matching
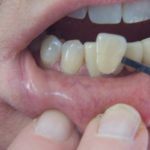
Side by side for dentin shade matching
- Educate the patient about metamerism, especially when a light or bleach shade PFM is being fabricated.
- Always take a shade of the preparation when prescribing an all-ceramic restoration. A dark colored prep will have a direct effect upon the final shade of the restoration, and must be compensated for by the laboratory.
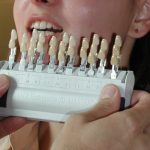
VITA has performed studies which demonstrate that 80% to 90% of patient shades are in the ‘M’ hue range. If using the 1st generation 3D Master guide, remove the L&R hue tabs from the guide and place them in a separate tab holder, thereby simplifying the initial shade taking process.
- If you’ve narrowed your shade selection to two shades, select the lighter of the two. It is much easier to increase the chroma and/or lower the value of a restoration, than it is to make it lighter or brighter.
- Do not stare at a shade for more than 5-10 seconds. The longer you stare, the more similar the shades will appear. To help readjust your eyes for yellow and orange acuity, look at something blue for a few seconds before evaluating the shade again. A blue dental bib works very well, and is conveniently located under the patient’s face, as well.
- Remember that a single central incisor is the most difficult shade match there is, and advise the patient of this, as well. These restorations sometimes require additional adjustments and should be taken into consideration in the event the patient needs the restoration by a specific date (usually a wedding).
- If the patient is considering or in the process of bleaching, do not attempt to predict the final shade. This is a guaranteed remake!
- If the patient is bleaching at home, advise them to stop when their teeth match the whites of their eyes, therefore maintaining an esthetic balance of their face.
- If the patient has completed the bleaching process, do not take the shade until a week after the last bleaching application, as it is common for a slight ‘bounce back’ to occur immediately after bleaching is finished.
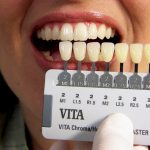
The Chroma/Hue tabs are arranged from richest to palest intensities.
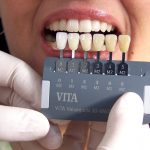
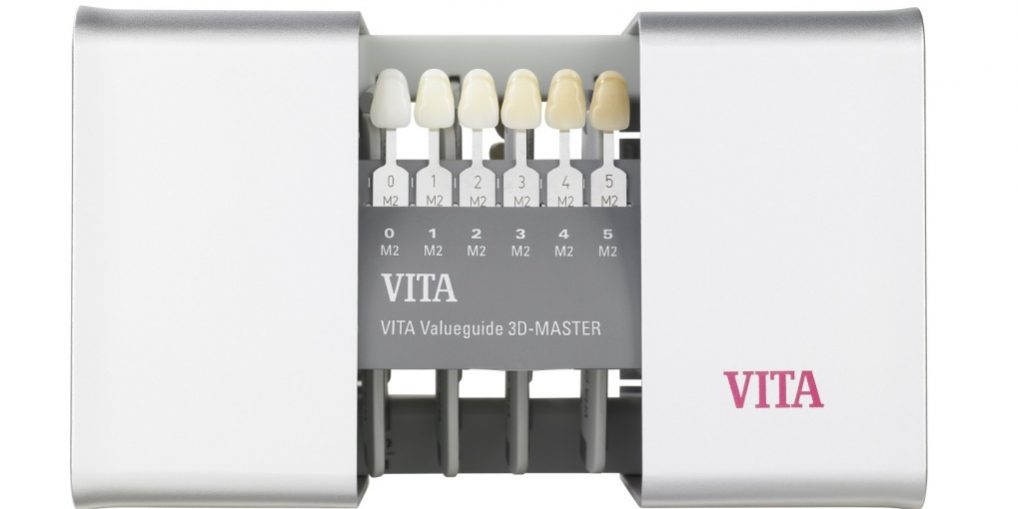
The value tabs are place in numerical order from 0 lightest to darkest 5. The gray shade guide holder helps to further highlight the value tab differentials.
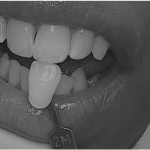
In-between’ value groups can be easily determined by placing two adjacent value tabs on either side of the tooth being measured

There are 6 individual shade guides. The first step in the selection will be made using the Value guide (Top dark gray guide) and second step choosing the Chroma -Hue
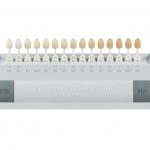
Exhibits the widest color range and more consistent distribution due to the seven additional in-between shade tabs. Ideal for planning and tracking whitening regimes. Also, the perfect guide for those dentists who prefer the Classical Shade holder design, but wish to experience the advantages and accuracy of the 3D-Master Shade System!
 William R. Mrazek B.Sc., CDT earned his Bachelor of Science degree from the University of Illinois, and his Associates Degree in Dental Technology from Triton College, (also in Illinois) where he graduated first in his class. He has 40 years of experience as a technician, and has been a CDT for 37 years. In the fall of 2012, he merged his laboratory of 31 years with the in-house laboratory of a 17 dentist group practice, where he is the technical manager and head ceramist for the Fixed Department.
Bill has presented over 500 lectures and seminars nationally and internationally since 1990 on a variety of topics, including ceramic techniques, esthetics, efficiency, production methods, and business methods. He also offers hands-on courses on ceramic building utilizing his highly efficient and accurate Functional Build-up Technique. He has published numerous articles and served on the editorial boards of a variety of dental publications including LMT, The Journal of Dental Technology, Quintessence, and PPAD, and is a consultant to a number of dental material and equipment manufacturers.
Bill will be retiring on January 4, 2017 from his position as technical manager and head ceramist. After that date, he will continue to provide consulting, technical and business seminars related to Dental Technology, and enjoying life with friends and family, as well as expanding his offerings as a published children’s book author.



Is it good that we always polish our teeth regularly.
Very good article, as a practitioner of smiles, I hadn’t considered this at all.