At some point during a patient’s denture journey, they will require treatment that involves replacement dentures. There are many reasons that a patient may request to duplicate some or all parts of their current denture. Patients, particularly geriatric ones who have worn their current prosthesis for many years, are not always able to tolerate change. Additionally, patients often do not want change. Their denture is their “look,” part of their body, and they are comfortable with their current appearance. Patients might fear change and the embarrassment that someone will notice their teeth are different and suspect they are wearing a denture. It is imperative that we focus on techniques that will best serve the patient’s request and provide a product that is as close to their current desired features as possible.
There are many ways technicians create references of a patient’s current denture that serve as great guides when setting up a new case. Some references include stone casts, stone index, use of alma gauge measurements, and matrices. They all serve as very good references when doing the new case set up but only allow a technician to get so close and give limited information. The wax duplicate denture technique will help provide an extremely close replication of a patient’s existing denture with confidence and high accuracy. Even if a patient wants to change existing aspects of their denture, this technique will serve as an excellent baseline for setting new denture teeth and making the changes the patient desires. It is the ultimate guide when denture duplication or close replication is requested for a new complete denture.
The wax duplicate denture gives a copious amount of information from the doctor to the lab in just one visit. The doctor can use the existing denture as a custom tray to take a functional wash impression. They can also take an interocclusal record of the existing relationship at the time of the wash impression. Transferring this information to the lab will allow the lab to construct and mount a master cast. Then, by using the wax duplicate denture technique, the lab will have all of the information needed to proceed to a wax try-in visit with certainty and confidence that the new denture set up is an extremely close replica of their existing denture as requested. Some doctors may decide under certain circumstances to skip a try-in. Even then, the lab still would have everything they need to complete the case with a superior reference while working on the denture.
The wax duplicate denture is very a versatile technique and can be used for an array of applications, more than just duplicating a denture. It can be a beneficial tool even if just used in place of the traditional baseplate and occlusal rim for the interocclusal record. The patient is used to the feel and phonetics of their current prosthesis and using a duplicate could aid in recording the correct centric record during the interocclusal record. The wax duplicate gives the lab a midline, high smile line and gingival carving patterns, current mold size and shape, set up patterns, buccal corridor width, jaw relationship in accordance to new master casts, flange thickness and tissue contours all while being removable from the master cast and able to be kept during the set up phase. It is also fabricated completely out of wax, aside from the stabilized baseplate, and therefore allows the clinician to easily mark-up and make any corrections using their current arrangement as a baseline for the markups. An additional application of this technique is easily fabricating an extra duplicate denture at the time of denture fabrication for those patients that request two sets right at the time of delivery. This technique is also quite useful on case resets that request to go to finish, however with a slight midline shift, but the rest of the set up is perfect. The many possibilities make this technique beneficial for much more than just the patient that wants to duplicate their existing denture.
- The clinician will evaluate the patient’s current denture and take a functional wash PVS impression using the current denture as a custom tray. The clinician will take an interocclusal record of the existing relationship during the functional impression. The laboratory will receive the case, and after disinfection, the technician will box and pour the impression to create a master cast for the new denture case (Fig. 1).
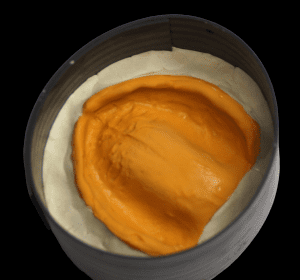
- After the stone is set, the technician will remove the cast with the impression and denture making sure to keep the impression and denture intact on the cast and then clean, trim, and refine the master cast. An arbor band can be used to smooth the land area and a blade to trim the impression material flash around the borders to expose the buccal flange of the denture (Fig. 2). Three wax sprues are added to the posterior portion of the denture (Fig. 3).
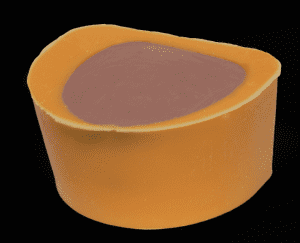
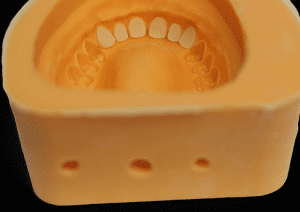
- Without removing the denture and impression from the newly created cast, create a silicone duplicate of the entire case (Fig. 4). Be sure to lubricate any existing PVS impression material that may be exposed at the borders to prevent any adhesion with new silicone duplicating material. After the silicone material is set, remove the cast from the silicone mold. Then remove the impression and denture from the cast (Figs. 5-6). Clean up the wash impression material from the denture and return the denture to the patient.
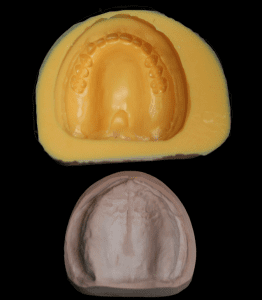
- A stabilized baseplate is fabricated on the new master cast. Trim and smooth the baseplate borders and seal the borders to the cast (Figs. 7-8).
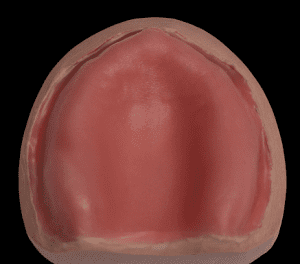
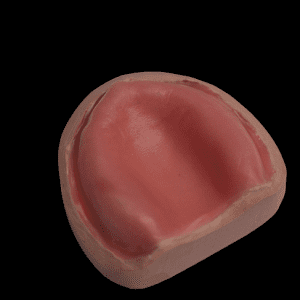
- The cast with stabilized baseplate is carefully placed back into the silicone duplicate mold using the silicone mold edges and the cast edges as reference. The cast should fit flush inside the mold with no movement. The smoothly trimmed land area will act as a stop and help seat the cast into the mold (Fig. 4).
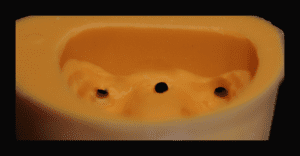
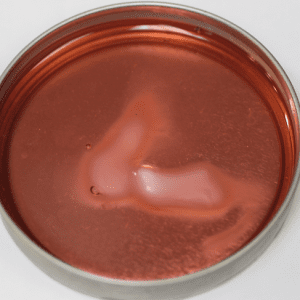
- Use a container that will be able to withstand molten wax and high heat with open flame. Heat all season or your preferred set up wax until it reaches a molten liquid state that is viscous enough to pour fluidly (Fig. 9). Caution and proper safety protocol should always be used to prevent any injury and burn from molten wax. Using a container that has a spout for easy pouring is best, however, wax can be carefully transferred into waxed paper cup for controlled pouring into sprue holes. Another option is to use an electric wax pot to liquefy the wax and use a syringe to draw up the liquid wax and inject it.
- Carefully and steadily pour the molten wax into the center sprue hole until the wax is pushed up through the two side vent holes and overflows (Fig. 10). Allow the wax to completely cool and solidify, then remove the cast and new wax duplicate from the silicone mold. The interocclusal record provided from the clinician and the wax duplicate denture can now be used to assemble the casts for articulation and mount the case.
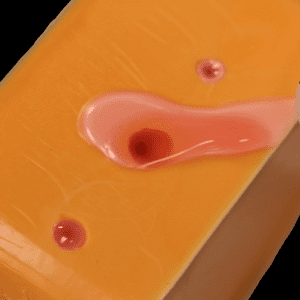
- Trim and contour the edges of the wax duplicate and smooth the borders using the newly fabricated baseplate as a guide for the newly established border (Fig. 11).
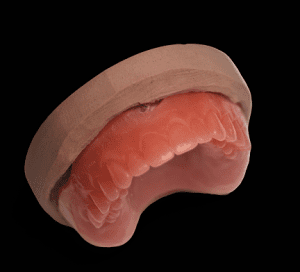
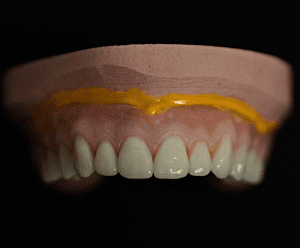
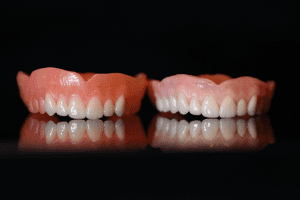
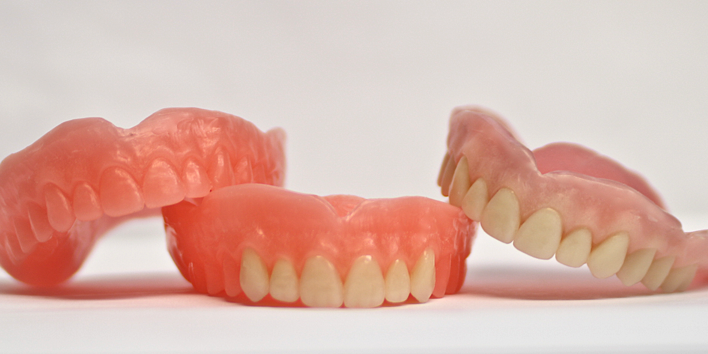
Figures 12-13 show a side-by-side comparison of the newly created wax duplicate and the original denture to be duplicated.
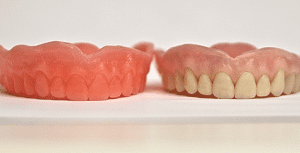
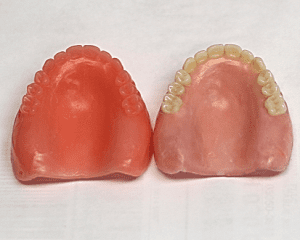
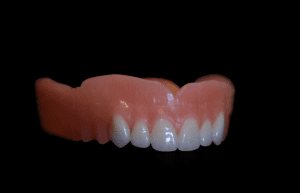
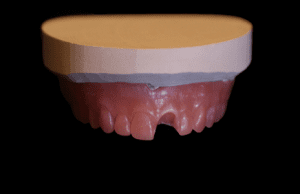
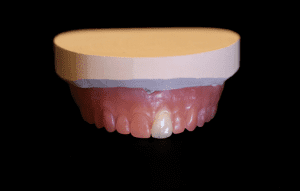
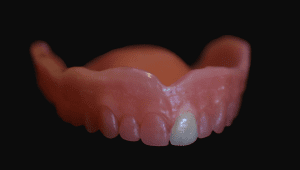
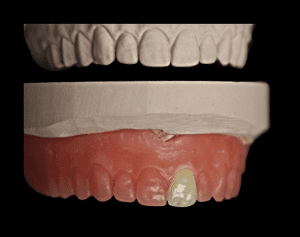
- From here, there are many variations and directions a technician can go with this technique as it is very versatile. If you know the exact denture tooth mold used, you can trim and lute the denture teeth individually into the corresponding area of the silicone mold and then proceed to the wax pour step (Figs. 14-15). This additional step would create essentially an exact duplicate with new denture teeth in place ready for try-in, or, in some cases, ready for process and delivery (Figs. 16-17). In some instances, clinicians may decide due to certain circumstance to skip a try-in and use the previously mentioned technique to substitute acrylic in place of the molten wax to create a fast duplicate denture.
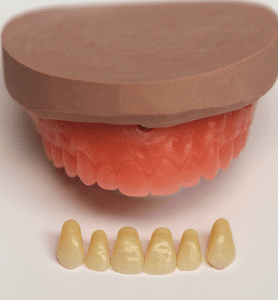
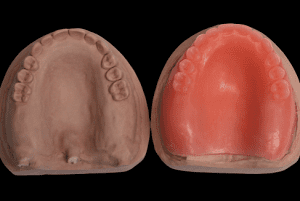
- The case is now ready for set up with the help of the fully wax duplicate. Each tooth one by one is carved out from the wax duplicate and replaced by the new denture tooth that matches in shape and size (Figs. 18-20). Utilizing a low heat soldering pen will allow for precision and accuracy when wax heating and placement. Individual placement allows for consistent reference points with adjacent teeth. In addition, a facial matrix can be made to aid in tooth setting and to give another additional reference. One benefit of using high-quality silicone duplication material for the initial case duplication mold is its long term stability and reuse qualities. It can not only be reused if needed to re-pour wax, it can also be poured with stone to create a third reference of a traditional stone cast duplicate of the denture and is extremely accurate (Figs. 21-22).
Applying the Technique Further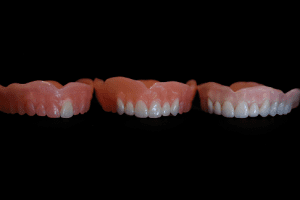
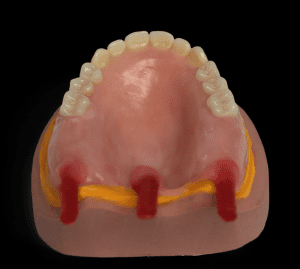
Another use for the wax duplicate denture technique can be applied to implant dentistry. Oftentimes patients have been used to wearing their existing dentures when they decide to proceed with implant treatments. These patients are generally content with and used to their current “look” and denture tooth arrangement. In these cases especially, patients may want to duplicate their current tooth arrangement when getting their new implant overdentures or hybrid implant bridges. This technique can again be used to aid in achieving a new set up for the implant case as close as possible to what their currently wearing. The same steps are taken to produce the wax duplicate denture. The only difference is that it is going to be modified to create a custom tray for the final impression for the implant denture. After fabrication of the wax duplicate on a baseplate, the lab technician will use the cast to locate and create holes in preparation for a custom open tray impression for the implant denture. The doctor will then use the wax duplicate denture with holes to take an impression with open tray impression copings, making sure esthetically the wax duplicate is seated in the correct position while the impression material is setting. The lab is now able to pour a final soft tissue and analog cast and proceed with the same technique steps for creating the standard wax duplicate. The same steps are used to create a silicone mold that will fit the new master cast and also correlate with the denture set up desired to be duplicated. From here, diagnostic setups can be easily fabricated to aid in creating a substructure that will adequately support and fit within the desired set up. In addition, after receiving the substructure, the cast with seated substructure can be placed back into the silicone mold and the same steps followed from pouring the molten wax. This provides a wax duplicate template for setting the teeth right on the substructure. The silicone mold step is required to be made twice in order to fit the preliminary and master casts respectively, but the time is worth it for the aid it gives when trying to serve the patient’s request to duplicate their current look.
About the Author
Shanon Torstenbo, CDT, TE
Shanon started her dental laboratory journey while attending school at Middlesex Community College in Lowell, Massachusetts in 2012. She graduated with an associate degree in dental laboratory technology in 2014. While in school she started as an in-house technician at a general dentistry practice. Here she was able to expand her skills while working with state of the art equipment and high quality material all while being on site and able to work directly with the patient and clinician. In 2017 she earned her CDT designation in the specialty of complete dentures. She continues to loyally work at the same practice and is always striving to become a better technician and learn more.



Really informative and valuable blog, keep sharing. Also, you could look Crown Dental Care